


 |
www.endoscoperepair.com

*F.A.Q. Complimentary Endoscope
Information and Inspection Procedures! F.A.Q. +Museum!
+
Visit our Endoscopy Museum below!


( Warning: Graphic
endoscopy photos )
BASIC VIDEO ENDOSCOPE R.G.B.
SYSTEM
Click here
for
Endoscope Specifications!
*Inspection
Procedures for Most Flexible Endoscopes:
Purchase a full comprehensive training video
on Inspecting any endoscope!:
SPVTIP-VHS...Olympus®,Pentax®and
Fujinon® Inspection Procedures
TRAINING TAPE......$50.00
| *Flexible
Endoscope INSPECTION PROCEDURES |
( black dots )
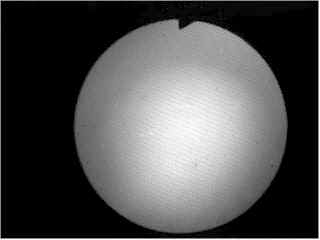
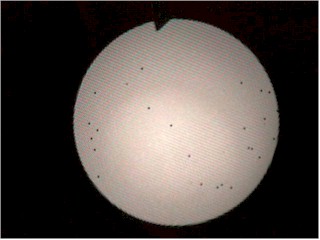
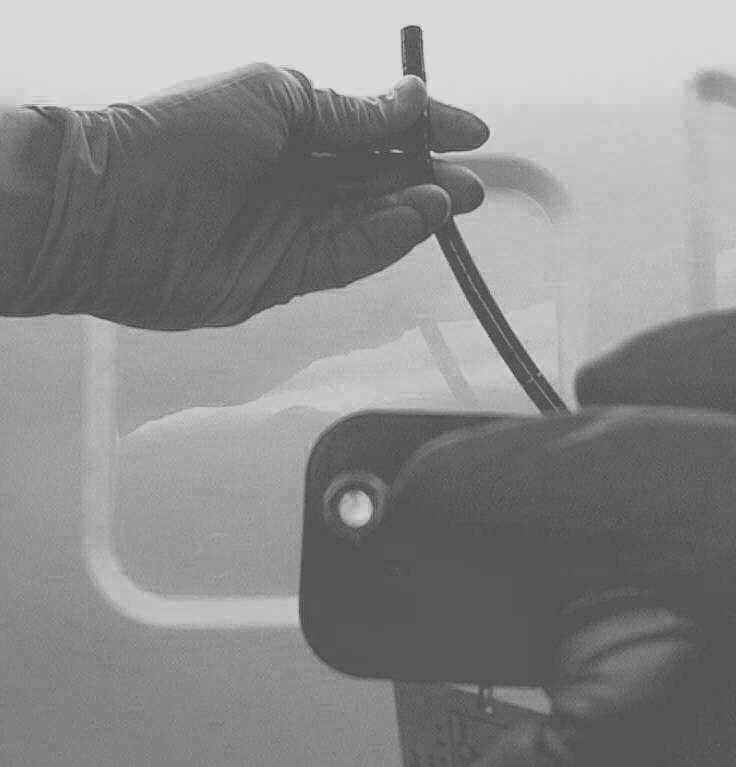
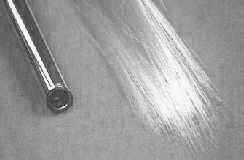
HOW TO CHECK FIBERSCOPES FOR BROKEN FIBERS!
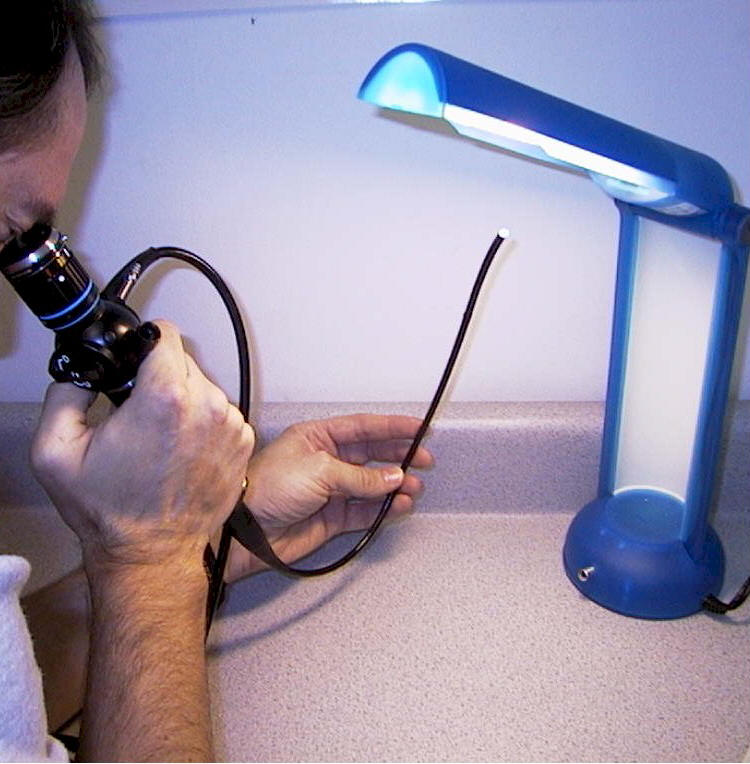
HOLD TIP OF SCOPE UP TO A
LIGHT, LOOK THROUGH EYEPIECE AND FOCUS.

ABOUT 24 BROKEN FIBERS, BLACK DOTS...
THIS SCOPE IS PERFECT, NO BLACK DOTS!
1) View the image: If fiberscope check
for: Broken fibers,
( black dots).
Observe if any signs of fluid invasion;
Stains, "Redcrack", X-Ray yellowing, image brightness etc.
Also view eyepiece for dust, fluid contamination etc.
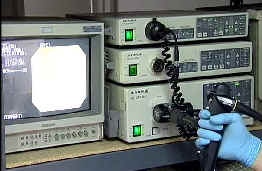
If checking a Videoscope; Put endoscope
in processor, observe image for signs of fluid invasion (
foggy ) and picture break-up, ( angulate the scope by turning
knobs). If Image is stained, redcrack
repair will be required. If video picture has interference, a
Major Fluid invasion or CCD repair is needed!
How Fluid Invasion
Problems Occur;
- If a scope has a leak which is not detected and the
scope comes in contact with any fluid, moisture will enter
the scope through the leak.
- In fiber scopes, the scope will have major fluid
invasion if the scope is immersed with then ETO venting cap
on. For video scopes, the water proof cap must be attached
before contact with any fluid.
- If a scope has a fluid invasion and is not repaired
immediately, video chip damage and image staining can
result, as well as corrosion of the internal metal
components.
Remember - fluid problems are a scopes worst enemy!
How Image And Light Guide Problems Occur;
- Buckles or bites in the insertion or light guide
tubes can break image and light guide fibers.
- Fluid invasion can cause staining of the fibers,or
video chip damage, if not repaired immediately. The fluid
also causes brittleness of the fiber bundles.
|

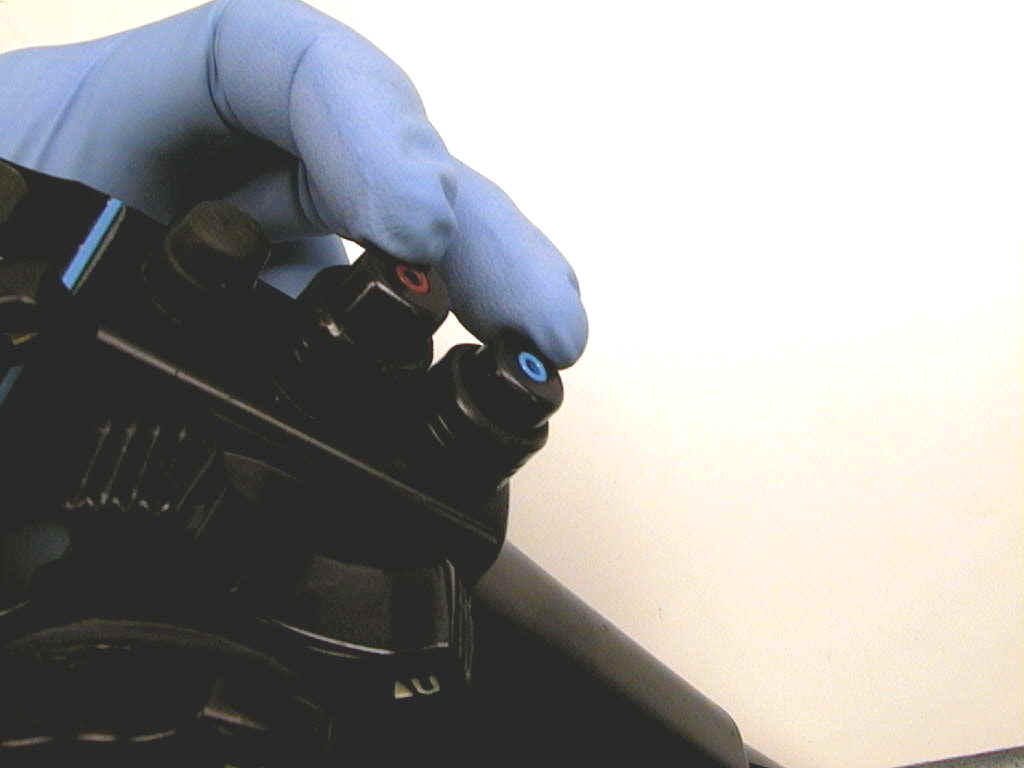
2) Plug Video scope into processor, test
#1 , 2,3,4 Freeze frame buttons. If
there is fluid invasion, buttons will either not work or cause
constant freezing and beeping of Processor and will require
replacement...
|
3) Observe Light guide illumination
bundle by observing image, then unplug scope from light
source, hold distal tip to a light and be sure it is not over
%10 broken.
If over 10%,
Illumination bundle will require replacement...
- Pulling on the insertion or light guide tube, as well
as dropping the scope, can cause broken fibers or damage to
the video chip.
|
4) Test Air Leakage: use a air leakage
tester and pump p endoscope with air: waiting 3 minutes @ 3.5
kg/cm2
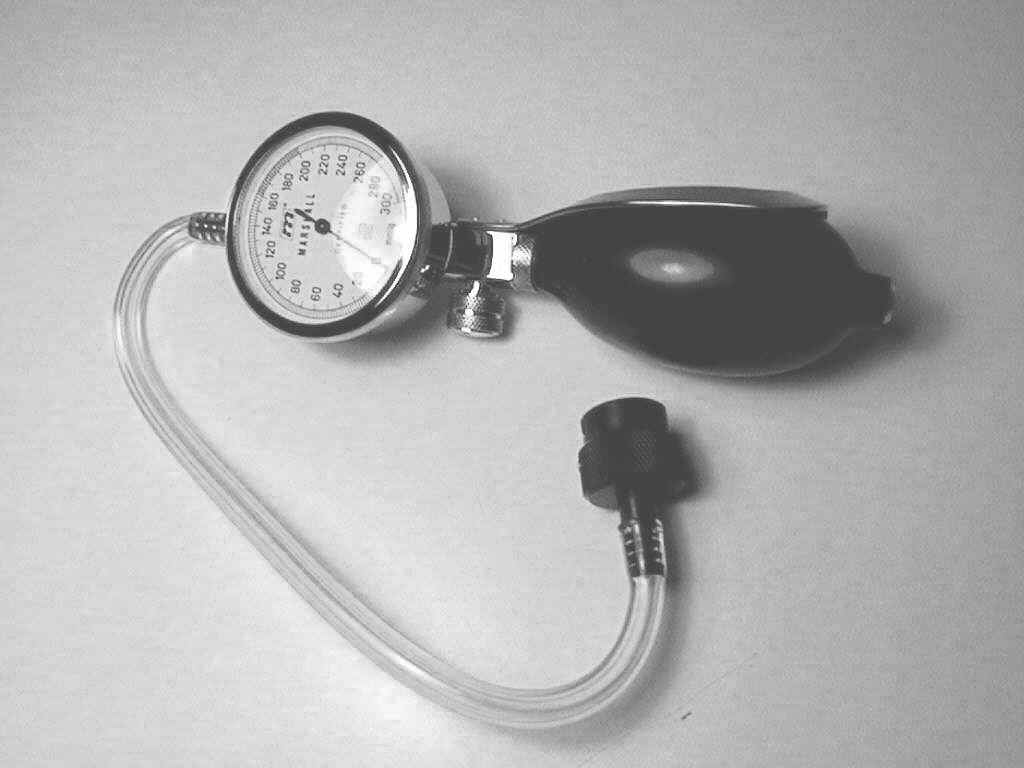
Submerse endoscope in water and
angulate endoscope to check for small leaks in bending rubber,
insertion tube, light guide tube, body etc

If leaks are found
anywhere on endoscope, this may cause Fluid invasion, and
endoscope will require Aeration immediately!
How Bending Sheaths Become Damaged;
- Any sharp objects like instruments, fingernails or
bites can cause tears or holes in the sheath material.
- Over time, normal wear or over inflation can cause
stretching or looseness of the bending rubber material.
- If the ETO cap is not in place during the ETO gas
sterilization process, the scope will pressurize and the
bending sheath will explode like a balloon. Follow the
instructions on the white card attached to the ETO cap.
|
5) Test Air Water functions: With
Endoscope plugged into light source or processor, and
depressing air/water valve; water should spray out of nozzle
over objective lens at least 30 cc's in 30 seconds, holding
finger on air valve; 50cc's in 5 seconds using a measuring
beaker...Water should shoot over objective lens. Be sure
nozzle is not missing. If air or water
is faulty or missing, air/water nozzle or channels will
require unblocking or replacing...
How Air/Water Problems Occur;
- Scope is not cleaned immediately following procedure.
- Nozzle is damaged, ,missing or misaligned.
- Glutaraldehyde buildup from chemical disinfectants
can break away from the channel and clog the air/water
nozzle.
|
6) Test suction by connecting endoscope
to suction pump and with suction on, depress suction valve
with tip in 80cc of water, endoscope should allow 80 cc's in 5
seconds. If a groove is worn in suction
port, suction will be decreased and will require
replacement...
|
|
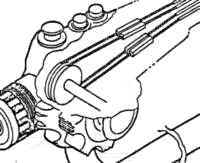
7) Using the correct size Biopsy Forceps, pass the
Forceps through the endoscope biopsy channel and text for
kinks in the channel. Angulate endoscope while passing through
distal end of scope. If forceps do not
pass or resistance is felt, channel(s) may require
replacement...
Biopsy Channel Damage Is Usually A Result
Of:
- Kinked, damaged or open Flexible Endoscope biopsy
forceps can cause tears in the channel material.
- Buckling of the insertion tube can also cause buckles
in the channel.
- Forcing instrumentation through the channel can cause
wear or tears in the channel material. This frequently
occurs in the bending section when resistance is met when
the scope is angulated. Do not pass anything through the
bending section with the tip is angulated further than 110°.
|
|
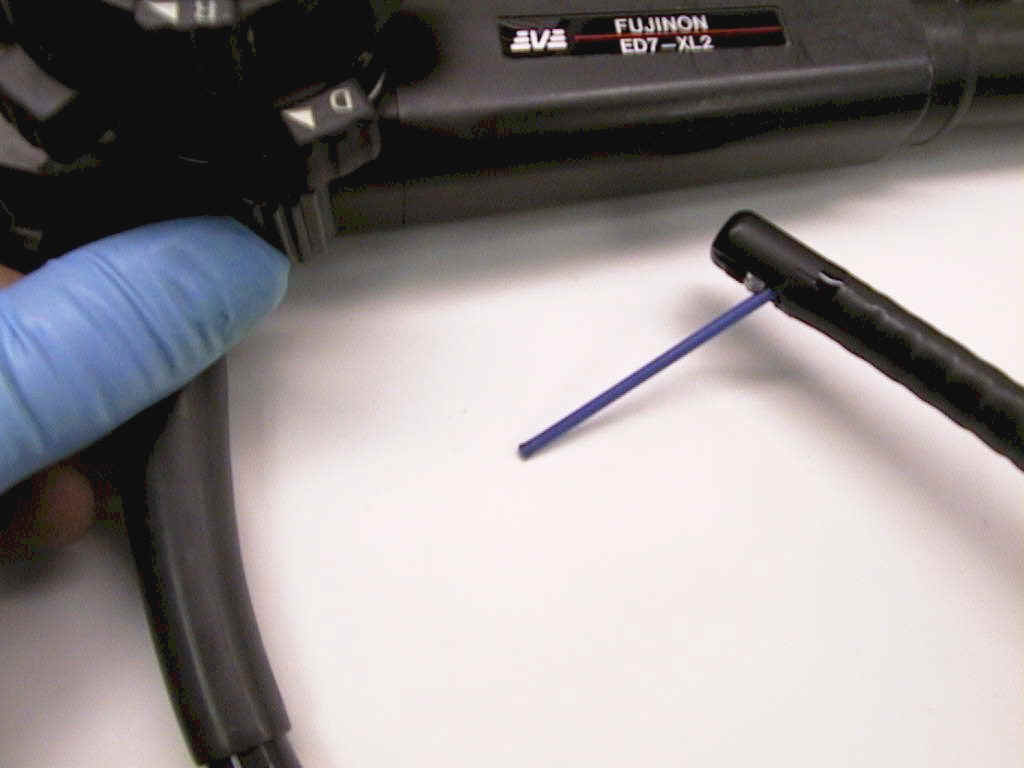
8) Using the correct size cleaning brush, remove suction
valve and pass through suction port till it is visible at
suction port on connector, if any
resistance is felt, suction channel will require replacement!
|

( represents bad buckles @ boot )
9) Check Insertion tube; look for any holes ( as in step
4 will show leaks). Check for wear, wrinkled, blistered,
buckles etc. Be sure that IT is not impacted, loose and
twists@boot! If buckled @ boot, or
anywhere on tube, insertion tube will require replacement!...
|
|
10) Check angulation; refering to manufacturers
specifications,using angulation chart; angulate endoscope.
Example: CF-100L: Up: 180°, Down
180°, Right 160°, Left 160°. Endoscope should angulate
smoothly with no play. If angulation is
tight or doesn't angulate at all,play and angles will require
adjustment or angulation wire replaced. If bending section
bends irregularly or to one side, bending section mesh or
articulating section will require replacement...
Angulation Problems
Are A Result Of:
- The angulation wires can stretch and break if the
angulation is forced.
- Buckling of the insertion tube can also stretch and
break wires.
- Play in the angulation control knobs usually
indicate an angulation adjustment is needed.
|
| 11) Check
Knobs, turn knobs back and forth. If they leak are loose or
cracked. They will require replacement.
If a grinding feeling is noticed on Pentax® or Fujinon®, drum
wire will require replacement.
|
|
12) Check the Light guide tube (umbilical), and
connector. Be sure there are no leaks,( as in step 4 will show
leaks), buckles or wrinkled etc. Be sure connector has no
loose parts, fluid in video connector etc. If
it has a leak, buckled or impacted, replacement is required!
|
13) Observe
the distal end,
 the
"c-cover" distal and cap should be round and smooth. Check
lenses, they shouldn't be cracked or dirty. Also the same for
objective lens. Check Biopsy channel hole, should be round and
smooth. If C-cover is impacted; cracked,
will require replacement. If lenses are cracked, they will
distort light and will require replacement. If biopsy channel
is cut with laser, c-cover or channel will require repair. the
"c-cover" distal and cap should be round and smooth. Check
lenses, they shouldn't be cracked or dirty. Also the same for
objective lens. Check Biopsy channel hole, should be round and
smooth. If C-cover is impacted; cracked,
will require replacement. If lenses are cracked, they will
distort light and will require replacement. If biopsy channel
is cut with laser, c-cover or channel will require repair.
|
14) Duodenoscopes: Elevator wire check. With forcep down
channel and pointing out of distal end approximately 1 inch,
move Control arm lever, forcep should move up and down at
distal end and observing image, should come into field of view
at manufacturers specifications. If
lever doesn't move elevator wire or is tight or stuck,
elevator wire or lever assembly must be repaired or replaced. |

WIRING DIAGRAMS FOR VIDEO SYSTEMS INFO!
F.A.Q.
Q: How often should endoscopes be checked
for maintenance? Are there generally blatant signs when a
scope is not working properly and should be checked?
A: Scopes should be leak tested after
every procedure and before disinfection. The most effective
leak test is to submerse the entire scope and follow orignial
equipment manufacturer (OEM) instructions. If a leak is
detected, the scope needs to be sent in for repair
immediately. Scopes should be checked for maintenance on a
weekly, monthly, or quarterly basis depending on the number of
scopes used and procedures performed.
There are blatant signs that a scope
should be checked. One of the most common is when a video
scope starts taking pictures by itself, or when it will not
take pictures. Usually this is a sign of fluid invasion. The
fluid has entered the video switch block controls and the
scope needs to be sent in for repair immediately. If a picture
is cloudy on a video scope, users should look for a buildup of
gluteraldehyde on the distal lens. If there is a buildup or
debris on the lens, clean the lens with a rubbing alcohol
wipe. If there is no buildup or debris on the lens, the video
scope probably has fluid in the distal end. The scope needs to
be sent in for repair immediately.
If a fiber optic scope is cloudy, look
for a buildup of gluteraldehyde or debris on the distal
lenses. If there is no buildup or debris, look for fluid in
the eyepiece and distal lenses. If there is any sign of fluid,
send the scope in for repair immediately.
Other signs are clicking and/or
sluggishness in the angulation controls, significant movement
of the insertion tube when angulating the distal end, poor
light transmission, color fluctuations in the video image,
blockage or friction when passing a brush through the biopsy
and/or suction channel, poor water and/or air flow, poor
suction and tears or significant dents in the insertion or
light guide tube. Users should call their repair company
and/or sales representative for inspection and/or advice.
Another sign is fluid in the water
resistant cap when it is removed after the disinfection
process. If fluid is present, redo the leak test. If the leak
test is negative, more than likely the water-resistant cap is
not so water resistant. Leak test the water resistant cap.
Scopes should be checked for rough edges,
sharp nozzles, and cracking/deteriorating glue as all of the
above can pose a significant risk to patient safety.
Q: What are the most common repairs made
to endoscopes?
A:
 |
Air/Water nozzle unclog and/or
replacement |
|
Bending rubber replacement |
|
Angulation adjustment |
|
Biopsy channel replacement |
|
Suction channel replacement |
|
Minor fluid invasion (typically the OEM
deems fluid invasion to require a major overhaul). |
|
Major fluid invasion |
Q: What services should endosuite
managers be looking for in a company that offers to repair
scopes?
A: Honesty, , and customer service! Scope
repair companies should be able to tell you why a repair is
necessary. Test your repair company. Tell them you suspect a
scope has a major fluid invasion, send it in for repair and
see what they quote. If you are going to experience the cost
savings of using an independent service organization, they
must be honest. is equal to honesty. Check out the of their
replacement parts. Without , pricing and turnaround time mean
nothing. Last but of great importance as well is customer
service. Everybody makes a mistake once in a while. How does
the lab honor a warranty? Do they continually look for reasons
to charge more money for their mistakes? The following are a
couple good questions to ask:
|
Who does the repairs? |
|
Where do the repair technicians receive
their training? It is good practice to know who is actually
doing the repairs. This allows the endosuite managers to
speak directly with technicians in case of immediate need
for communication. |
|
How are the technicians paid? Do they
receive a percentage of their billings? *What is their
turnover? |
What parts are used in the repair
process? Specifically, what type of bending rubber glue is
used? Some companies use glues.
|
What type of replacement biopsy
channels are used? Ask to see the biopsy channel. Some of
the biopsy channels being used are high but some are of very
poor . Variations in can cause premature kinking and are
more susceptible to puncture via biopsy forceps or cleaning
brush. |
|
What type of replacement suction
channel is used? Ask to see the suction channel. Is there a
spring wrap at each end of the suction channel to avoid
premature kinking? Check out the of Teflon used in the
channel. Variations in can cause premature kinking and
possibly more susceptible to puncture from a cleaning brush.
|
|
What is the process for repairing the
bending section mesh covering the bending section? Ask to
see the mesh and the different sizes available. Is the mesh
replaced or is Teflon tape used to bandage the mesh? Teflon
tape can affect the movement of the bending section that can
cause a variety of problems. |
|
What type of replacement insertion
tubes are used? Is the insertion tube manufactured with a
dual opposing flat coil spring? If the insertion tube is
overly Flexible Endoscope or flimsy, it may have one flat
coil spring. This can cause a variety of mechanical problems
as well as physician complaints of the scope being too
Flexible Endoscope . Does the coating hold up against
cleaning and disinfecting? If the insertion tube is not
coated/protected properly, the insertion tubes can
prematurely leak, split open, and/or buckle. The same
questions apply for the light guide tube. |
|
Does the company support the recoating
and/or retubing of insertion tubes? Metal components of the
insertion tube tend to wear with use. If the tube is
recoated toward the end of the insertion tube life cycle,
mechanical problems may develop. This defeats the investment
of the repair. |
|
What type of replacement light guide
lenses are used? Ask to see the light guide lenses. Is the
entire assembly replaced or is the top lens replaced or is
optical glue used to replace the lens. Poor lenses and/or
repair can cause the light to spray improperly producing a
dark image while inside the patient. This can be construed
as a bad video chip. |
|
Does the company repair video chips?
Ask to see the video chip. If they repair the video chip,
ask about the process. Ask about the warranty? |
|
Loaners! Does the company provide
loaners? Ask to see their loaner inventory. Ask about the
availability of loaners. |
|
Ask to see their repair facility. Meet
the technicians. Meet the repair staff. Ask as many
questions as possible. A good repair company has nothing to
hide! |
|
Ask about the number of repair
technicians and the number of scopes repaired. |
|
Ask about the number of customers they
have in the market place. Sometimes more means less. Repairs
take time. The larger the volume of scopes being repaired
may mean there is less time spent on each scope repair to
insure high . |
Q: Are some scopes more fragile than
others? Are there any brands known within the industry that
generally require more repair than others?
A: Small diameter fiber optic scopes are
more fragile than other scopes.
Special protection should be used during
storage and transport.
Each brand of scopes has advantages and
disadvantages. For liability reasons, We cannot mention a
particular OEM, but managers should look into the warranty and
what kind of support they will receive after the purchase. If
they are buying used equipment, make sure the company has
their own repair capabilities. Some scopes are made to last
and others are what we call resposable scopes. They are not
made to be worked on. Once they break they typically require a
major overhaul by the OEM. This defeats the purpose of buying
a less expensive scope.
Q: If a scope is treated ideally, how
long is the expected lifespan? How long should endonurses and
technicians expect to be able to trust a scope that has been
repaired before worrying about sending it in again?
A: Ideally a scope can last quite a long
time but the life span depends upon the number of procedures
and the number of scopes used to perform those procedures.
Obviously an account with a sufficient number of scopes to
meet the procedure volume will experience a greater life span.
The lifespan also depends upon proper handling, use, care, and
maintenance.
A scope is typically not sent in for
repair until it develops a problem. Obviously a scope repaired
with parts and workmanship will last much longer than a scope
repaired with low parts and poor workmanship.
Q: How should scopes be treated to
prevent excessive repair bills?
A: Scopes should be treated according to
OEM specifications. Most nurses and technicians do an
excellent job in the handling of endoscopes. We recommend
having dedicated cleaning personnel. This avoids the number of
people involved in the handling process. Fewer people involved
can reduce excessive repair expenses. Dedicated cleaning
personnel can reduce repair bills by routinely performing
proper cleaning and disinfection procedures as proscribed by
the OEM. Familiarity with the scopes can prevent damage before
it occurs. A technician familiar with the scopes can usually
notice buckles or kinks in the channels and other signs as
listed above that if detected would be a minor repair charge.
Leak testing is by far the most important step in reducing
repair expenses.
|
OLYMPUS®
CLEANING AND REPROCESSING CHARTS CLICK HERE!

INSPECTION PROCEDURES BIOPSY FORCEPS |
| Handle should
open jaws cleanly and smoothly. If jaws
are locked shut, repair of jaws is required. If Handle broken,
replacement required. |
| Observe coil
pipe, they should be smooth and straight.
If bent or twisted, coil pipe
replacement is required. |
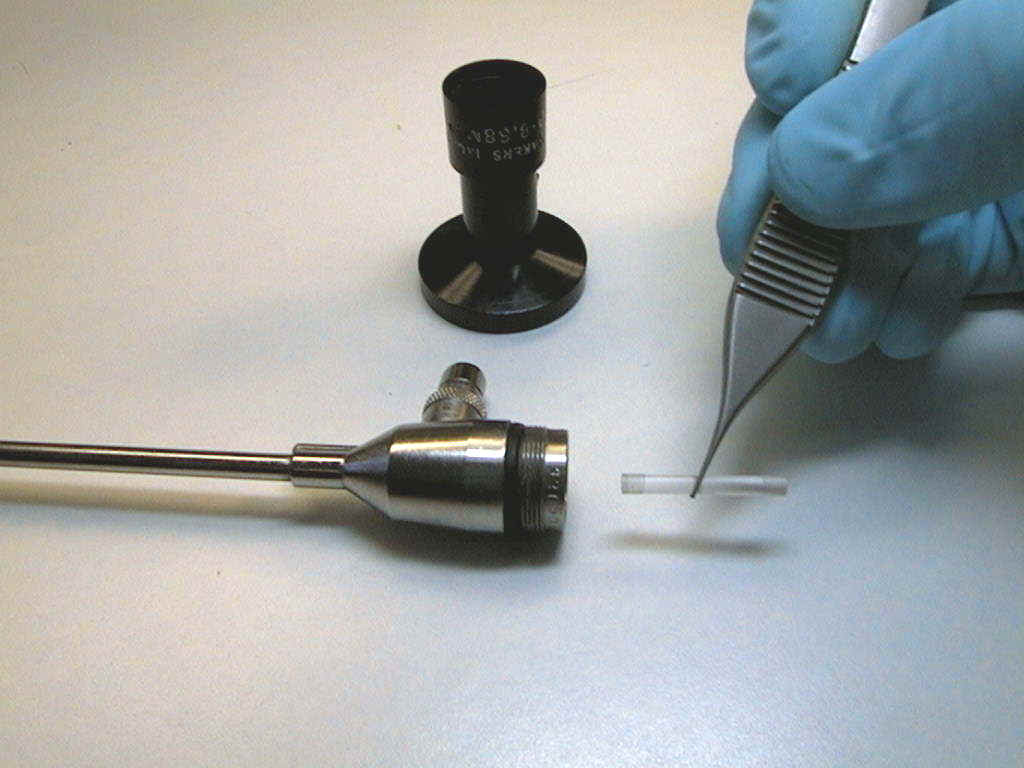
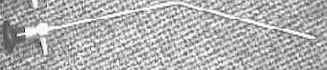
INSPECTION PROCEDURES RIGID ENDOSCOPE |
Observe eyepiece section.
If dropped and damaged, eyepiece will
require repair. |
Observe image, should be crystal clear.
If foggy or any specs of dust or dirt,
repair required: ( Eyepiece, rod lens, objective ). |
Observe image, it should be
crystal clear.
If distorted or no image, repair
required: ( Eyepiece, rod lens, objective ).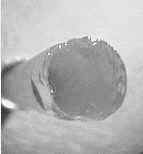
(
chipped Rod lens ) |
Externally view distal tip of endoscope, check objective
system. If impacted and damaged at tip,
repair required. ( Objective system ). |
Inspect
the metal shaft of rigid
endoscope, it should be straight. If
impacted, bent and damaged at tip, repair required. (
Straighten or replace shaft, rod lenses, possible refiber ). |
Point the tip at a light, observe light post of rigid
endoscope, it should be round and bright with less than 5%
broken fibers. If more than 5% it will
require re-fibering. |

Gastro Links +

Return to Online
Repair Price List
!
7322 Manatee Ave. West #265
Bradenton, FL. 34309 USA
Call or Text : 941 209 8276
1.941.209.8276

* Inspection procedures
are industry wide inspection tests. They may not be Manufacturers recommended
inspection procedures.
|
|